What the Bespoke Engagement Ring Process Looks Like, Stage by Stage
A bespoke engagement ring is one of the most sought-after choices when it comes to choosing the perfect ring! But what does that mean? A bespoke engagement ring is a defined production sequence that runs through 8 distinct stages, almost always in the same order, with most ateliers quoting a 6 to 8 week build window and recommending a 10 to 12 week buffer if the proposal date is fixed.
The client signs off on each stage before the next one starts, which is what separates bespoke from a customised stock setting. The work moves from a conversation about how someone lives, to a sketch, to a 3D model, to a sourced stone, to a wax pattern, to molten metal, to a set diamond, then finally to a polished and inspected piece sitting in a presentation box. The stages below describe what each step looks like, who handles it, and how long it tends to take inside a competent jewellery house.
Initial Consultation
The first meeting is a brief-building exercise. A senior designer or design consultant spends 45 to 90 minutes with the client mapping the variables that determine the ring: lifestyle and daily wear, finger size, metal preference across platinum and 18k or 14k gold in white, yellow, or rose, stone type across natural diamond, lab-grown diamond, sapphire, or other coloured stones, and how the budget should be split between centre stone and setting. Heirloom material, if any, is logged at this stage so the goldsmith knows in advance if old gold will be melted down or if an inherited diamond is being reset. How cool is it that you can do that?!
Most ateliers send an inspiration questionnaire or mood-board link before the consultation, so the in-room conversation starts from images rather than from scratch. The Knot’s editorial coverage of bespoke design notes that the consultation tends to function as a discovery session rather than a sales pitch, with open questions about hand shape, profession, and proposal timeline taking up as much space as questions about carat weight. By the end of the meeting, the brief is written down, and a sketch direction is agreed upon. A follow-up is booked for sketch or CAD review, usually 5 to 10 days out, depending on the complexity of the brief and the workload at the bench.
Budget framing also gets handled here. Most established ateliers prefer to start from a number the client is comfortable with and work backward into the design, rather than designing first and pricing the result. The split between centre stone and setting often runs 70/30 or 80/20 in favour of the stone for diamond-led briefs, though that ratio inverts for clients who want a heavy goldsmithing piece around a smaller or coloured centre stone.

Design Sketches
The sketch stage translates the brief into shape. The designer produces hand drawings or stylized renderings showing 2 or 3 viable directions: a solitaire variant against a halo variant, for example, or 3 takes on a 3-stone composition with different shoulder treatments. Sketches give the client something to react to before any 3D work is commissioned, which keeps the more expensive CAD phase focused.
Not every house formalises this stage. Smaller studios sometimes skip straight from consultation to CAD, while larger ateliers treat sketches as a deliverable in their own right. Where it does run, the goal is narrowing rather than committing. The client picks one direction, comments on what they want carried forward and what they want dropped, and the designer documents those calls in writing before the brief moves to the modeler. A clean sketch round usually takes 3 to 5 working days, including one revision pass on the chosen direction.
CAD Review
CAD stands for Computer Aided Design and refers to the 3D modeling software jewelers use to build a ring with millimeter accuracy before any metal is touched. Brown Goldsmiths and other established ateliers describe the CAD file as the production blueprint: every dimension, prong angle, and gallery cut-out is locked in the file, and the wax pattern is generated directly from it.
The CAD review itself usually runs over 1 to 2 weeks. The client receives a render set showing the ring from the top, from the side, and from the gallery underneath, with the stone layout to scale. 2 to 3 revision rounds are standard at most bespoke houses. Brilliant Earth’s custom workflow, for instance, builds in up to 3 revisions before the file is locked. Common adjustments at this stage include band width, setting height, prong shape and count, and the depth of any pave or milgrain detailing on the gallery.
CAD is also where errors get caught cheaply. A prong basket that looks elegant in a sketch can read as fragile at scale, or a halo can crowd the center stone in a way that only becomes visible in 3D. Modelers will often produce a quick photoreal render showing the ring on a scaled hand, which helps the client check proportion against their own ring size before signing off. Once the render set is approved, the file is exported for production, and no further design changes are made without restarting the approval loop.
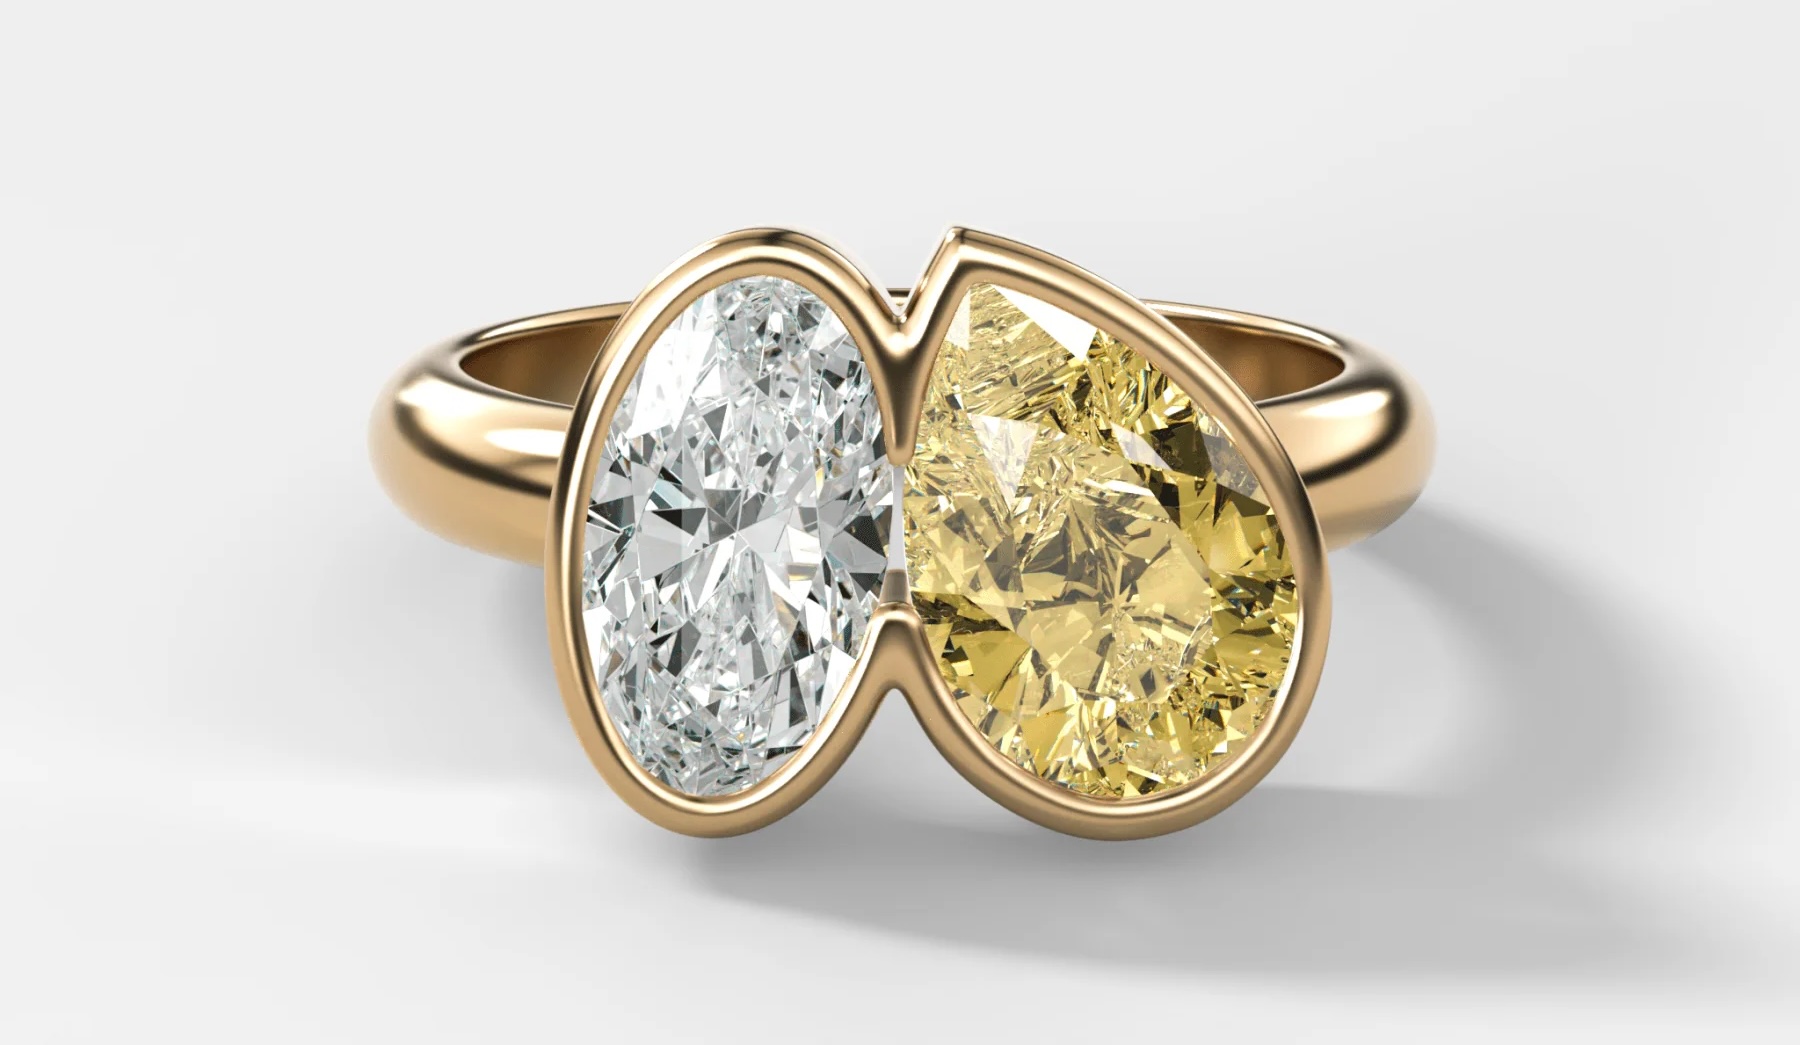
Stone Selection
Stone selection runs in parallel with CAD work or starts the moment the brief is firm enough to define shape and carat range. The atelier sources options through its diamond and gemstone trade contacts, then narrows the inbound results to a curated short list of 3 to 6 stones that meet the agreed parameters for shape, carat range, colour, clarity, and budget. Some bespoke houses, including GOODSTONE, present clients with a curated set of GIA-graded stones that match the agreed-upon brief before narrowing to a final pick.
GIA stands for the Gemological Institute of America, the third-party grading lab most often referenced in the trade. A GIA Diamond Grading Report covers shape, measurements, carat weight, colour, clarity, cut grade, polish, symmetry, and fluorescence, with a plotted clarity diagram. Each report carries a unique number that the client can verify on gia.edu while the stone is being reviewed. For diamonds between 0.15 and 1.99 carats, GIA also issues a Diamond Dossier, which contains the same grading data without the plotted diagram.
Clients usually inspect the short list through high-magnification video, ASET or hearts-and-arrows imaging, where relevant, and in-person viewing if the workshop is local. Comparisons across the short list tend to focus on cut quality and visible inclusions rather than on grade letters alone, since 2 stones with identical paper grades can look meaningfully different under loupe inspection. Once the final stone is picked, it is reserved, paid for, and shipped to the atelier for production. That’s such an exciting part!

Casting
Casting is where the design first takes physical form. Most bespoke workshops use lost-wax casting, a metal-forming technique that the Penn Museum and Formlabs both date back roughly 6,000 years and which remains the dominant method for fine jewellery production. The CAD file is used to generate a wax pattern, either by milling the wax from a solid block on a CNC machine or, more commonly now, by printing the pattern on a high-resolution wax-resin printer.
The wax pattern is sprued, meaning a small wax rod is attached to it and fixed to a wax tree along with other patterns going into the same casting run. The tree sits inside a steel flask, and investment plaster is mixed and poured into the flask under a vacuum so no air bubbles are trapped against the wax surface. Once the investment hardens, the flask goes into a kiln. The wax burns out completely, leaving a clean cavity in the shape of the ring inside the plaster. This is the step that gives the technique its name.
Molten metal is then introduced. Platinum, 18k or 14k gold, palladium, and silver are all cast this way, with the temperatures and equipment varying by alloy. Most ateliers use vacuum or centrifugal casting machines to draw the metal cleanly into the cavity. After the flask cools, the investment is broken away, the rough ring is cut from the sprue, and the casting is cleaned, filed, and pre-polished in preparation for setting. A clean cast is checked against the CAD file and the rough weight before it leaves the casting bench.
Setting
Setting is bench work, done by a stone setter under a microscope or high-magnification loupe. For a prong-set centre stone, the setter first cuts seats inside each prong, small ledges that catch the girdle of the diamond and stop it from rocking. The stone is then placed in the head and checked for level from every angle. If it sits proud on one side (higher up) or tilts, the seats are adjusted before any prong is bent.
Once the stone is sitting flat, the setter bends and burnishes the prong tips over the crown of the diamond. Excess prong length is trimmed, and the tips are rounded so they read as soft droplets rather than as sharp points. White Flash and other reference guides describe the standard quality bar in straightforward terms: the prongs should not encroach on the table facet of the stone, and there should be no visible gap between the inside of the prong and the crown.
4-prong and 6-prong heads are the norm for round and oval centre stones. 8-prong heads tend to appear under very large stones or under halo designs that need extra security. Side stones, pave, and channel-set accents are worked in as part of the same setting session, with the setter often switching between gravers, beading tools, and a microscope-mounted pneumatic hammer, depending on the technique. A centre stone setting typically takes a setter half a day to a full day; pave-heavy work can run several days.

Polish and Final QC
After setting, the ring is finished. Polishing uses progressively finer abrasive wheels and buffing compounds to remove file marks, casting texture, and any tooling traces left from the bench. The brief determines if the surface is taken to a high gloss polish, a brushed satin, a matte sandblast, or a combination, and the polisher works the inside of the band with as much care as the outside, since the inside is what the wearer feels against the skin every day.
White-gold rings receive an additional step. White gold is a slightly warm grey alloy in its raw state, so jewellers electroplate a thin layer of rhodium over the surface to give the ring the bright white finish associated with platinum. Brilliant Earth’s plating reference notes a typical thickness of 0.75 to 2.0 microns, which is enough to deliver the appearance and surface protection without the brittleness that thicker layers can develop.
Final QC follows polishing. A reputable workshop checks prong security with a fingernail and a fine probe, confirms stone alignment under magnification, weighs the finished ring and compares it to the cast weight, validates finger fit against the ordered size, inspects the hallmark stamp, and looks the surface over for scratches or polish drag. The finished piece is also compared side by side with the approved CAD render to confirm the geometry matches what was signed off. Anything that fails goes back to the bench rather than out the door. The QC sign-off is usually documented and filed against the order, both for the workshop’s own records and for the appraisal that ships with the ring.
Delivery and Aftercare
Delivery is the last formal stage. The ring is presented in its packaging together with the paperwork the client should keep on file: the GIA report for the centre stone, an independent appraisal for insurance scheduling, the metal hallmark documentation, and any care instructions specific to the materials used. Most bespoke houses also include a sizing tolerance and a first re-sizing window built into the original quote, since fingers can settle differently on the hand once a ring is being worn daily.
For clients planning a proposal, the atelier will often coordinate timing so the ring is ready a week or 2 ahead of the date, leaving a small buffer for any last-minute sizing or polish corrections. Couriered handovers are standard for clients who do not collect in person, with insured shipping and signature requirements written into the closing paperwork.
Aftercare runs on a longer cadence and is typically offered at no charge by the originating atelier. Standard items include ultrasonic and steam cleaning every 6 to 12 months, prong tightening on the same schedule, and re-rhodium plating for white-gold pieces roughly once a year, depending on wear. Re-polishing is offered when surface scratches accumulate, though most setters prefer to defer it until needed since each pass removes a thin layer of metal.
The house that built the ring is usually best placed to service it, because the bench knows the geometry and the alloy. That continuity is part of what the bespoke fee covers, and it tends to be where the relationship between client and atelier extends past the original delivery date.
So, now you know all about how a bespoke engagement ring is made! Isn’t it a fascinating process?

Discover more from FORD LA FEMME
Subscribe to get the latest posts sent to your email.
